I've had lots of questions about how I make my heart sculptures. I wrote a post on where I got the idea and how I shape the hearts here. Today I'm going to share my process for decorating the hearts - taking them from a blank 3D framework to a finished piece of art. The look I'm going for is that of a strange, rough artefact. At each stage I need to be careful not to get too precious. With this project, messy is best!
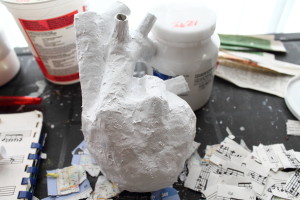
1. First I cover the newspaper with white paint to create a blank surface to work on.
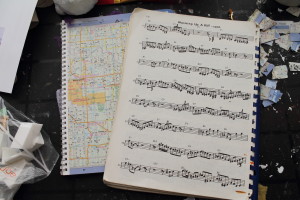
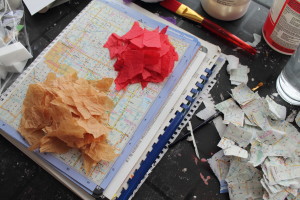
2. Next I tear up pieces of maps, music notes, and different colours of tissue paper. On some hearts I used varying shades of one colour (light blue, medium blue, dark blue) but on this one I just had one shade of red so I mixed it with this beige colour. I also ripped up some patterns I made in an art class years ago - I'm a big fan of recycling!
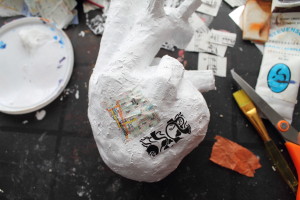
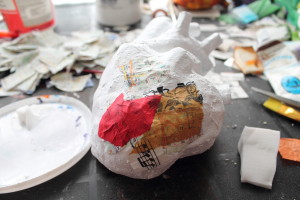
3. I use a matte medium to glue the pieces, alternating maps, music notes, and the pattern with tissue paper. I use a sponge to coat both the surface of the heart and the piece I'm gluing. Then I cover each piece with matte medium to seal it and repeat this process until most of the heart is covered. I try to work quickly and not think too much about it, which I learned from Nick Bantock. This gives it a chaotic, unplanned look that I love.
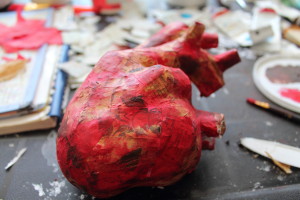
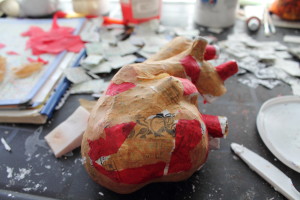
4. I use a sponge to apply red paint unevenly across the surface. Some areas I make quite dark and some I barely touch. I try to bring out the texture of the paper by gently grazing the sponge over rough spots and again, I try to work as quickly as possible. After the red I went over it again with some brown, trying to give it a scuffed-up look. (No, I'm not left-handed, this is just me pretending to paint since I couldn't figure out how to hold the camera in my left hand!)
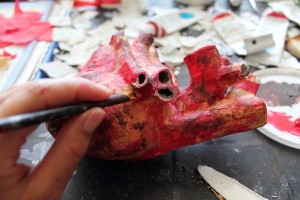

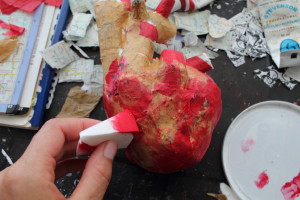
5. I then use a paint brush to fill in remaining white spots with red. I usually paint inside the tubes with the colour I used on the outside, but the red wasn't dark enough so I used a dark brown. Next come the veins on the front and the sides (I forgot to do this so there's no picture!)
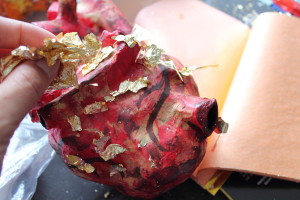
6. To apply gold leaf I paint the glue on haphazardly, let it dry, then crumple the leaf up and stick it to the glue. This way it comes out uneven and spotty, rather than in solid chunks, which I prefer.
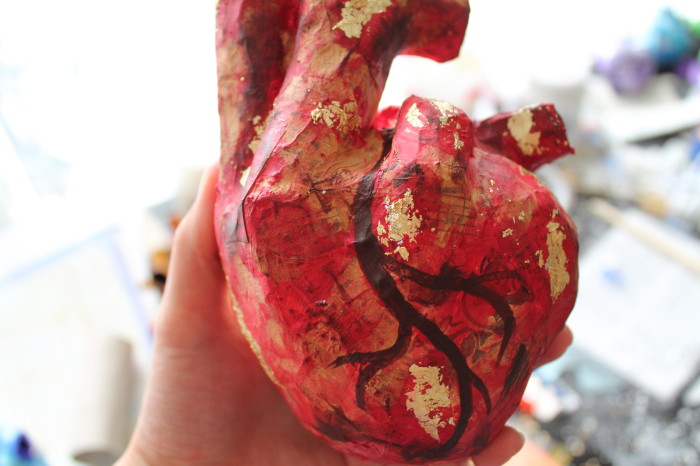
7. This is almost finished! It just needs a coat of varnish and a stained wooden stand (which my woodwork-loving boyfriend makes for me!)
I'll be selling these new hearts at the Art Walk in Edmonton this weekend! Stop by Friday, Saturday, or Sunday between 10am and 5pm. I'll be on the North side of Whyte Avenue between 103 and 104 Streets.